Online Banking Guide
|
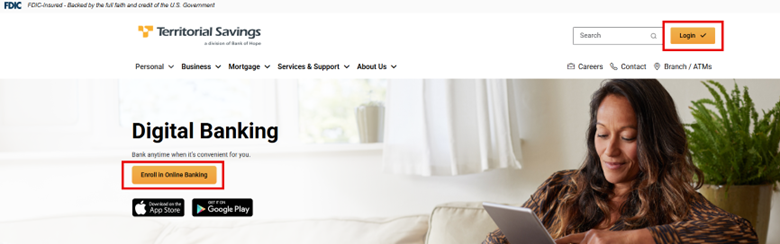
Step 1. Click the 'Enroll in Online Banking' button shown on the header of the Digital Banking page. |
|
|
Step 2. Or on the top right corner, click the 'Login' button and select the Personal or Business option from the drop down menu. |
|

|
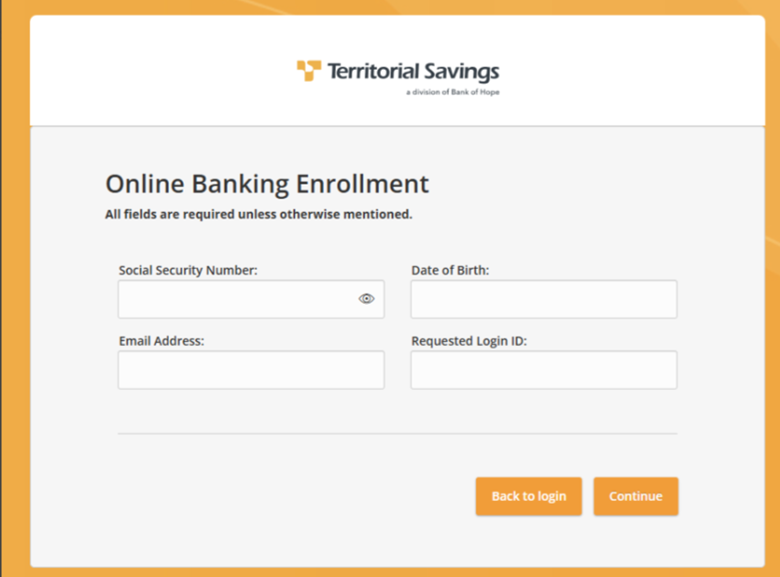
Step 3. Fill out the Online Banking Enrollment web form. All information entered needs to match customer information in DNA record. |
 |
|
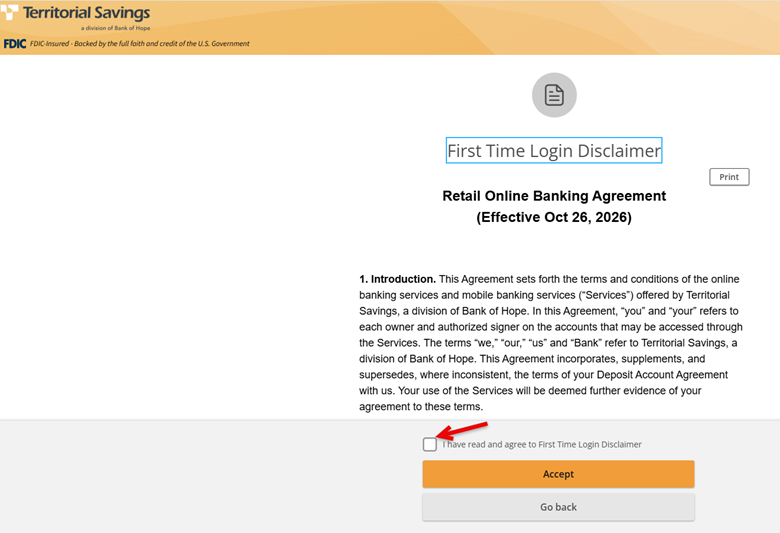
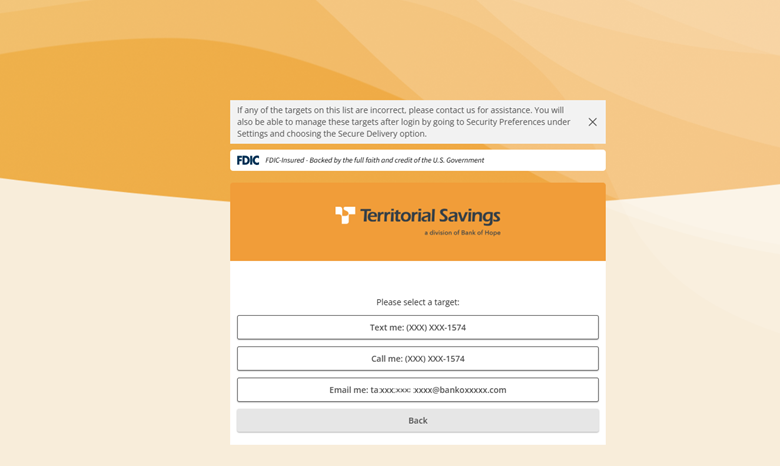
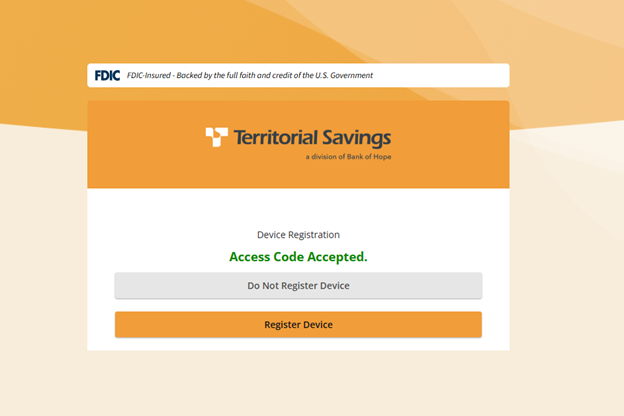
After successfully enrolled, when logging in to Online Banking, read and accept the Retail Online Banking Agreement. |
 |
|
 |
|
 |
|
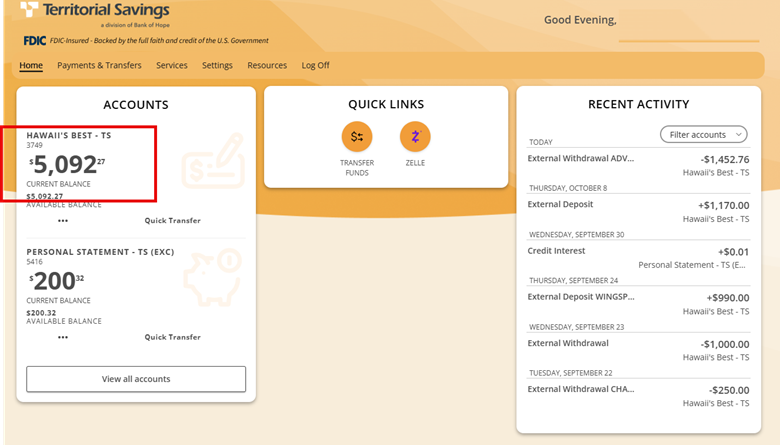
Step 1. Once you are logged in, you will see a display of your account(s) on the Home screen.
|
|
Step 2. Select the Account title to view details and transactions history. |
|
|
Step 3. Click on Transactions or Details & Settings for account information. |
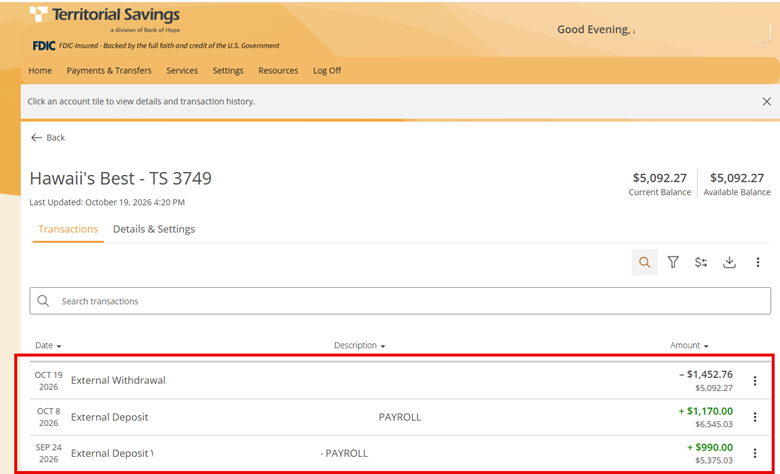 |
| Select an Account and on the Details & Settings tab, you can view your full account number and routing number including other account-related details. | 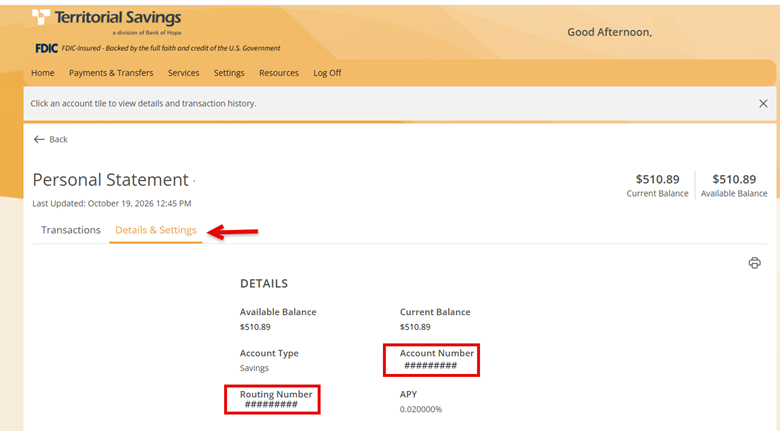 |
|
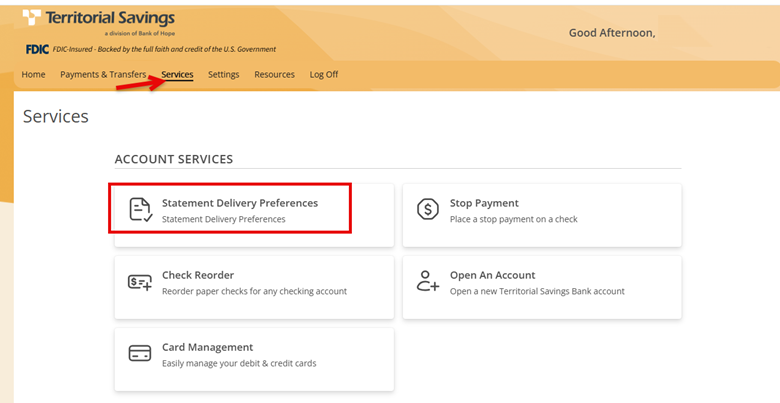
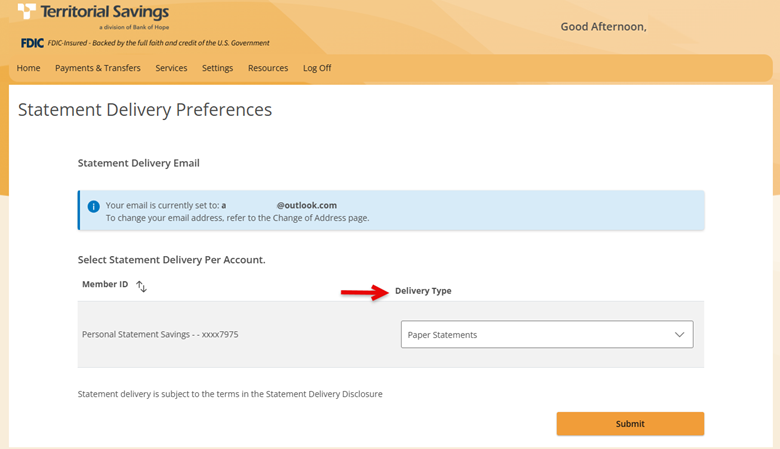
Step 1. Select the Services option and click on Statement Delivery Preferences. |
|
|
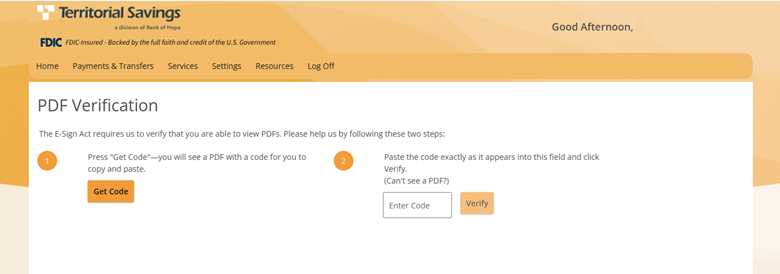
Step 2. Complete the PDF Verification instructions shown on the screen. |
|
|
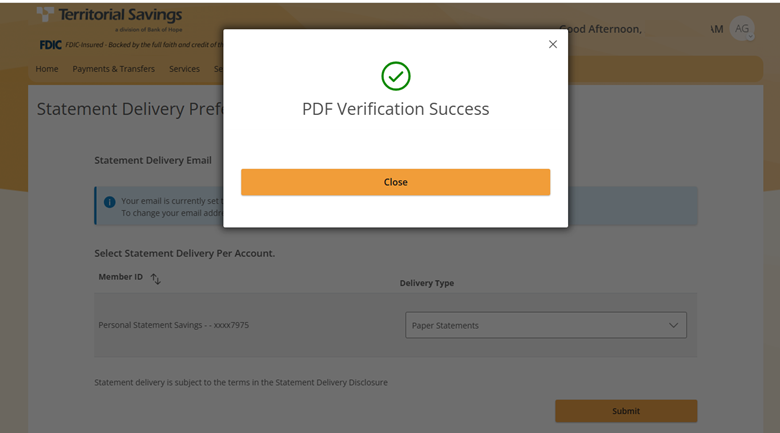
Upon successful completion, click Close. |
 |
|
Step 3.
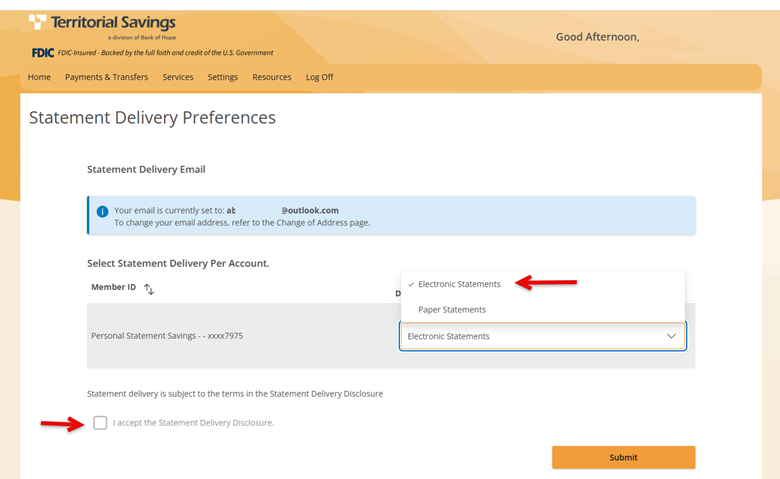
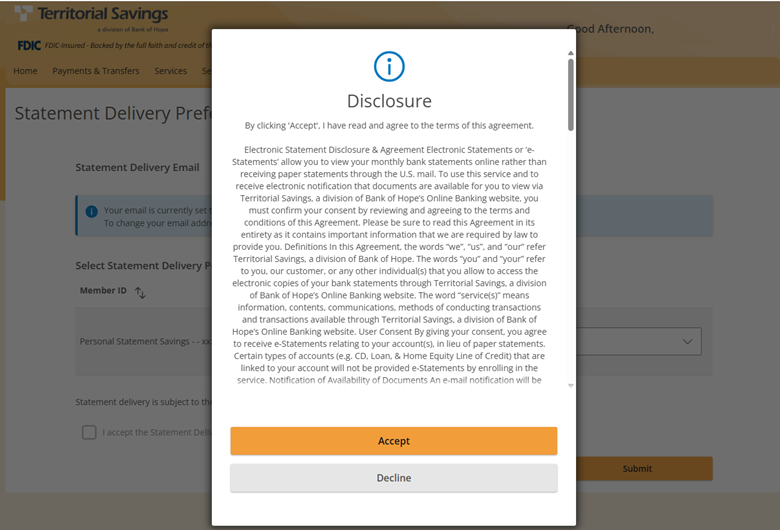
Select the Delivery Type Preferences between Electronic Statements or Paper Statements. Accept the Statement Delivery Disclosure and click Submit. |
|
|
Step 4.
On the e-statement screen, select the following fields and click View documents for accounts.
|
|
|
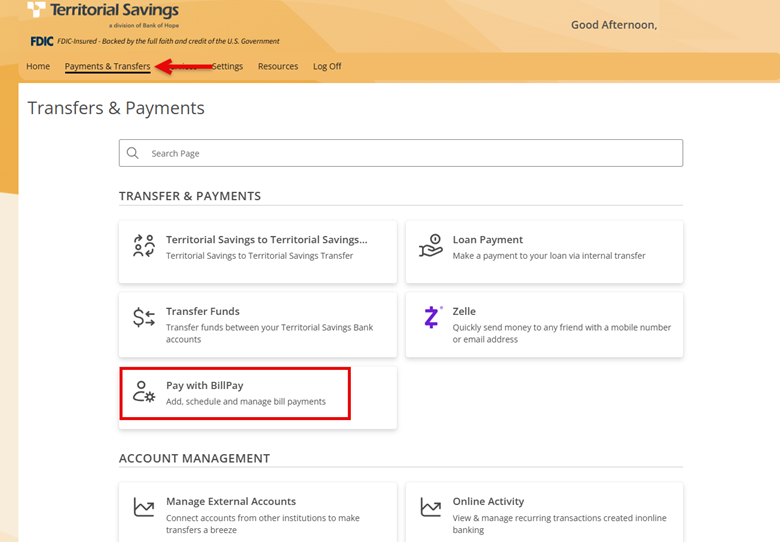
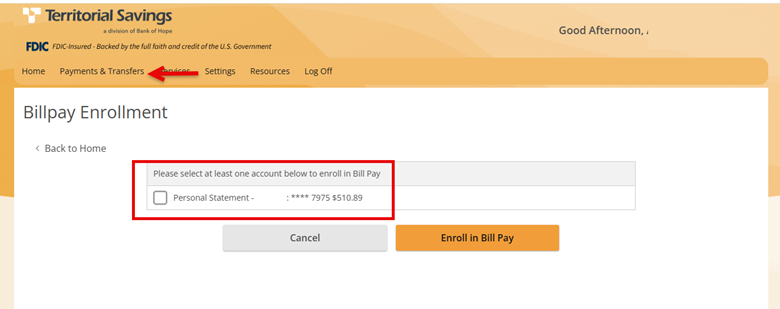
Step 1. Select Transfers & Payments and click on Pay with BillPay. |
|
|
Step 2. Select the account(s) to enroll for the Bill Pay service and click Enroll in Bill Pay |
|
|
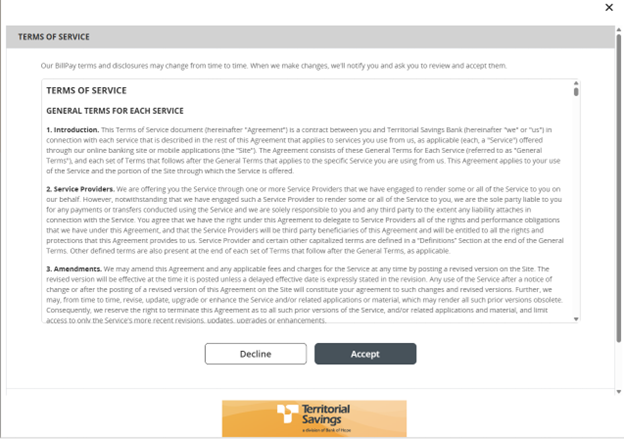
Step 3. Accept the Terms of Service. |
|
|
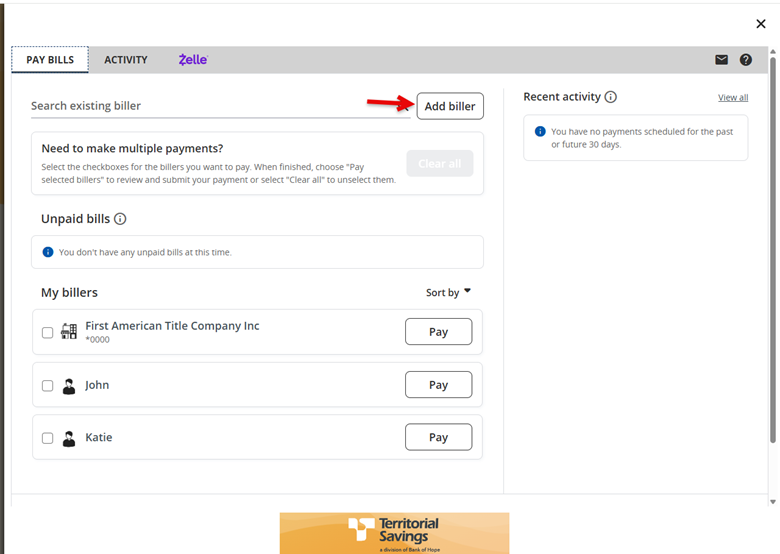
Step 4.
Click Add Biller to add payee. |
|
|
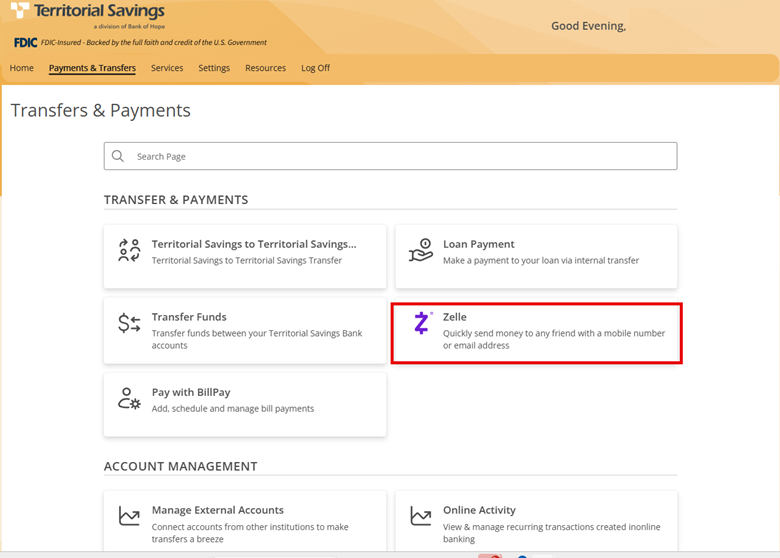
Step 1. Select Transfers & Payments and click on Zelle®. |
|
|
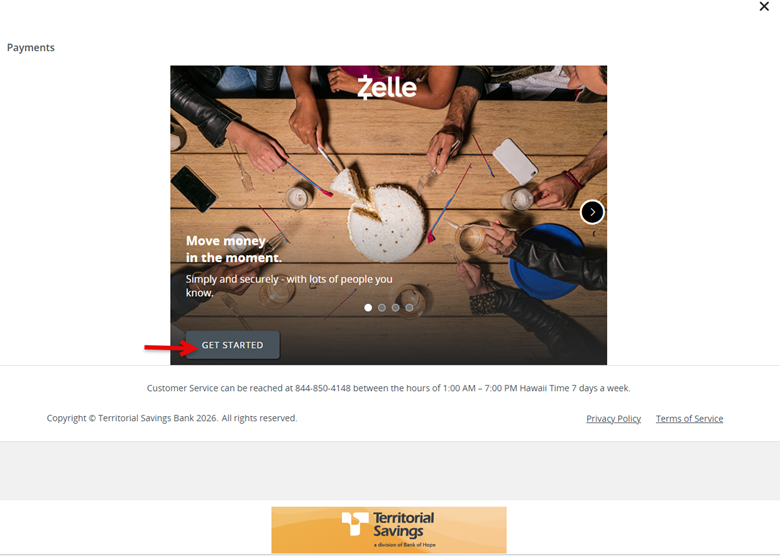
Step 2. Click Get Started on the Zelle® page. |
|
|
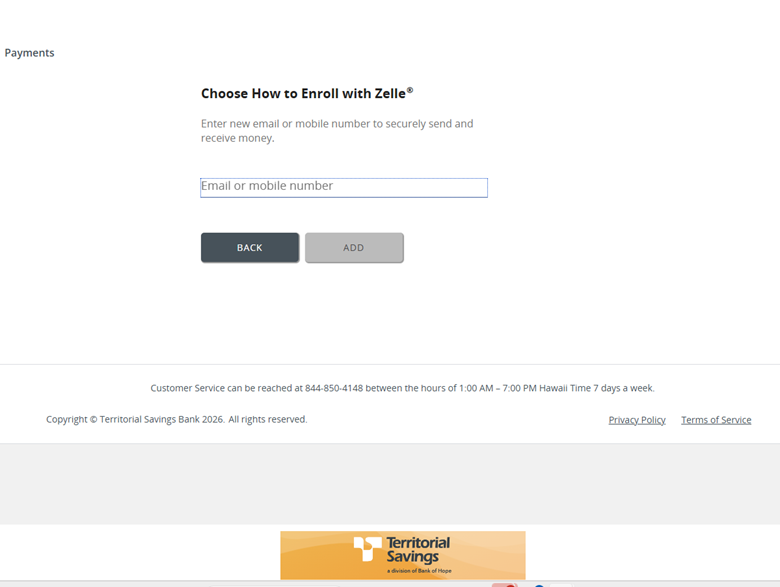
Step 3. Enter your email or phone number. |
|
|
Step 4.
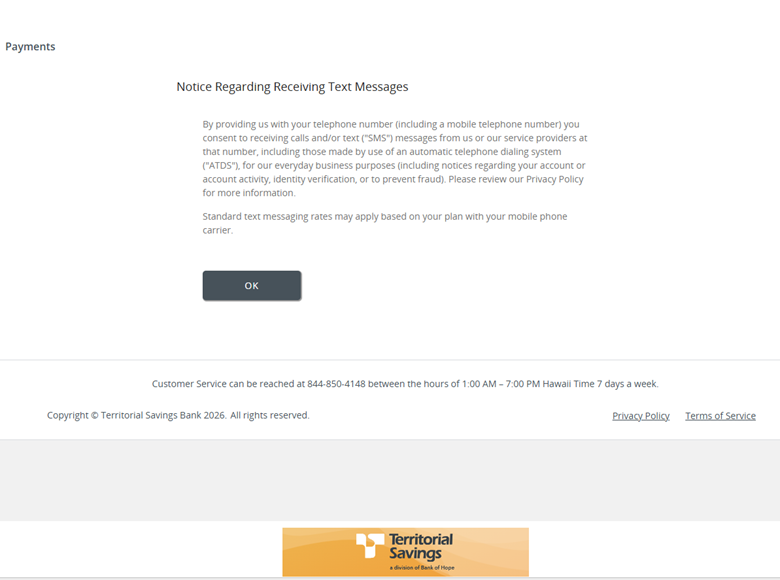
Accept the Notice regarding receiving text messages. |
|
|
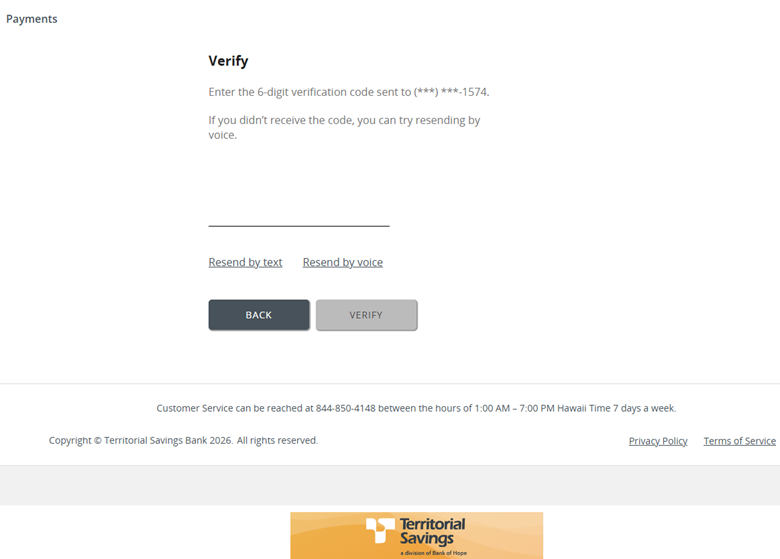
Step 5.
Enter the one-time passcode you received. |
 |
|
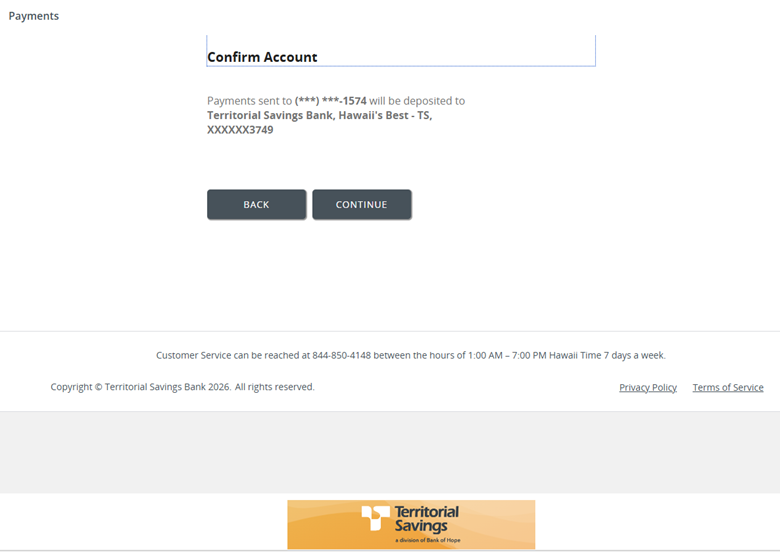
Step 6.
Confirm the account setup and click Continue. |
 |
|
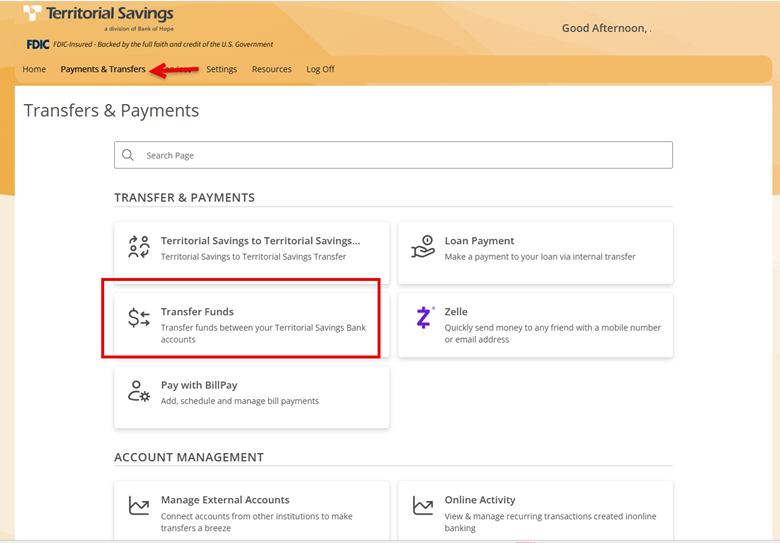
Step 1. Select Transfers & Payments and click on Transfer Funds. |
|
|
Step 2.
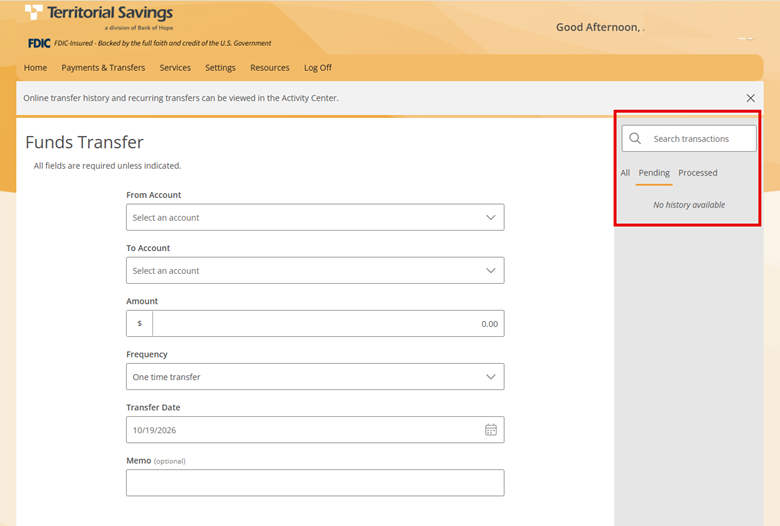
Complete all the fields and click Transfer Funds. Note: On the right side of the screen, you can also search transactions and view 'All, Pending, Processed' transactions. |
|
|
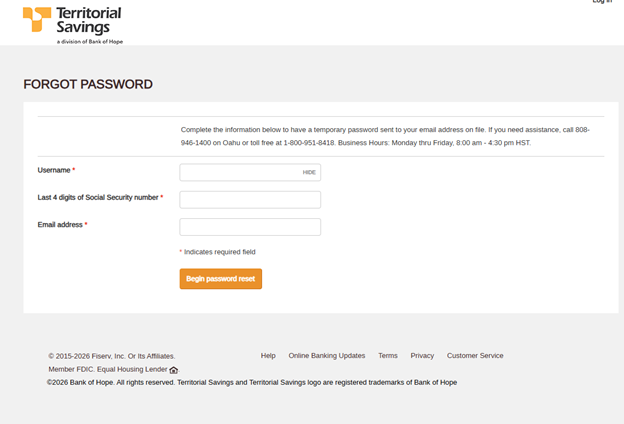
Step 1. Visit territorialsavings.com and click on Forgot Password near the log in module. |
|
|
Step 2.
Complete the required fields shown on the screen and click Begin password reset. |
|
Mobile Banking Guide
|
Step 1. Search for Territorial Savings in the App Store (Apple Store) or Google Play Store. Step 2. Select the Territorial Savings app for Consumer or for Business. Step 3. Follow the instructions prompted by your device to download and install the mobile banking app. |
|
Step 1.
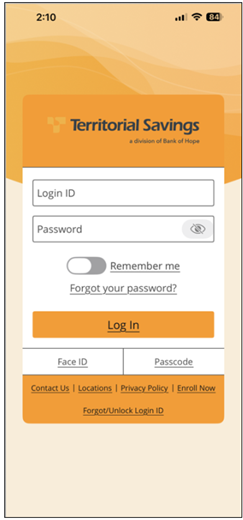
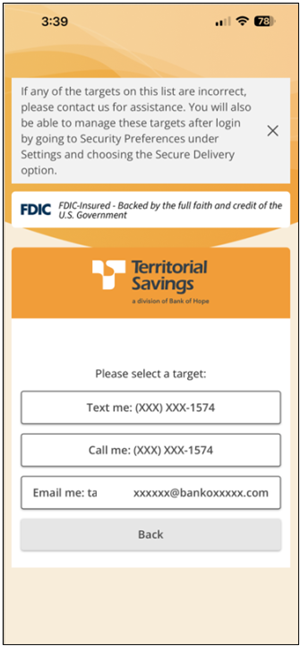
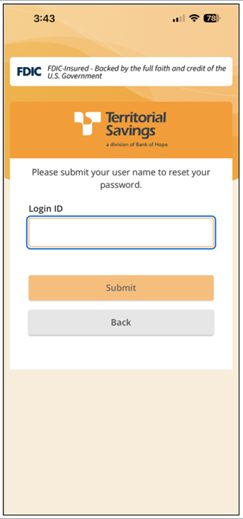
Open the Territorial Savings mobile app and enter the Login ID and Password. Enable the Remember me toggle to save your Login ID credential. Tap Log in and select a SAC delivery method. |
|
|
Step 2.
To rest your password, tap Forgot your password? and follow the steps. |
|
|
Step 3.
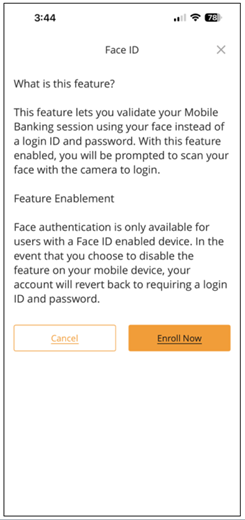
To setup Face ID security authentication, tap Face ID. |
 |
|
Step 4.
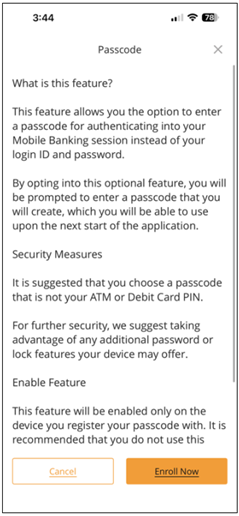
To setup Passcode Security Authentication, tap Passcode.
To obtain your Login ID or unlock your Login ID, tap Forgot/Unlock Login ID. |
|
|
Step 1.
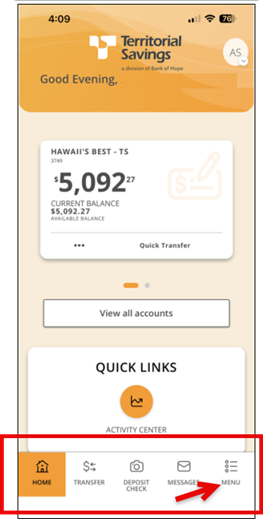
After logging in, tap the icon at the bottom to view various services. |
|
|
Step 2.
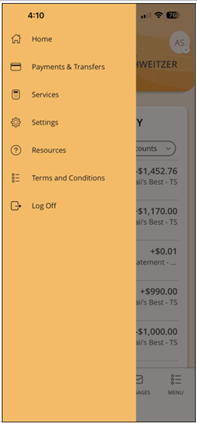
Tapping the Menu option will expand other features and services available on the mobile banking app. |
|
|
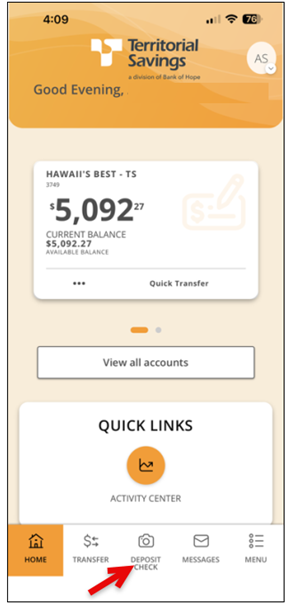
Step 1.
Within the mobile app, tap the Deposit Check icon. |
|
|
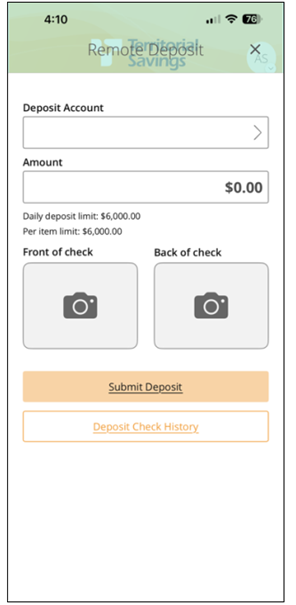
Step 2.
Select the Deposit Account, enter the Amount, snap a front and back photo of the check you would like to deposit. Click Submit Deposit. |
|
|
Step 1.
Within the mobile app, tap the Deposit Check icon. |
|
|
Step 2.
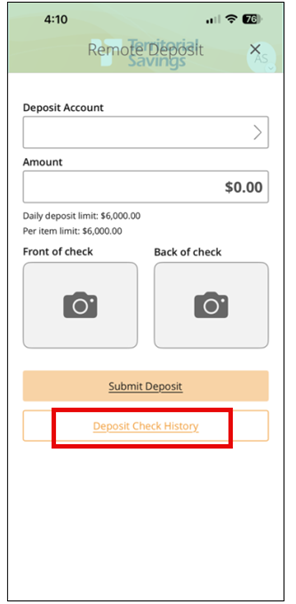
Select the Deposit Check History button and the screen will navigate to the Online Activity page to the Checks screen. |
|